Checkout flow (Marketplaces / Stores)
Many online stores and marketplaces have a 'checkout flow' where buyers input their address and get various quotes depending on the shipping services available. Here we'll describe the typical pages present in this flow, and when and how the Sendle API is called. Look at the Partnership section for more information, and our Partnerships team can provide more specific information and guidance.
Sender details
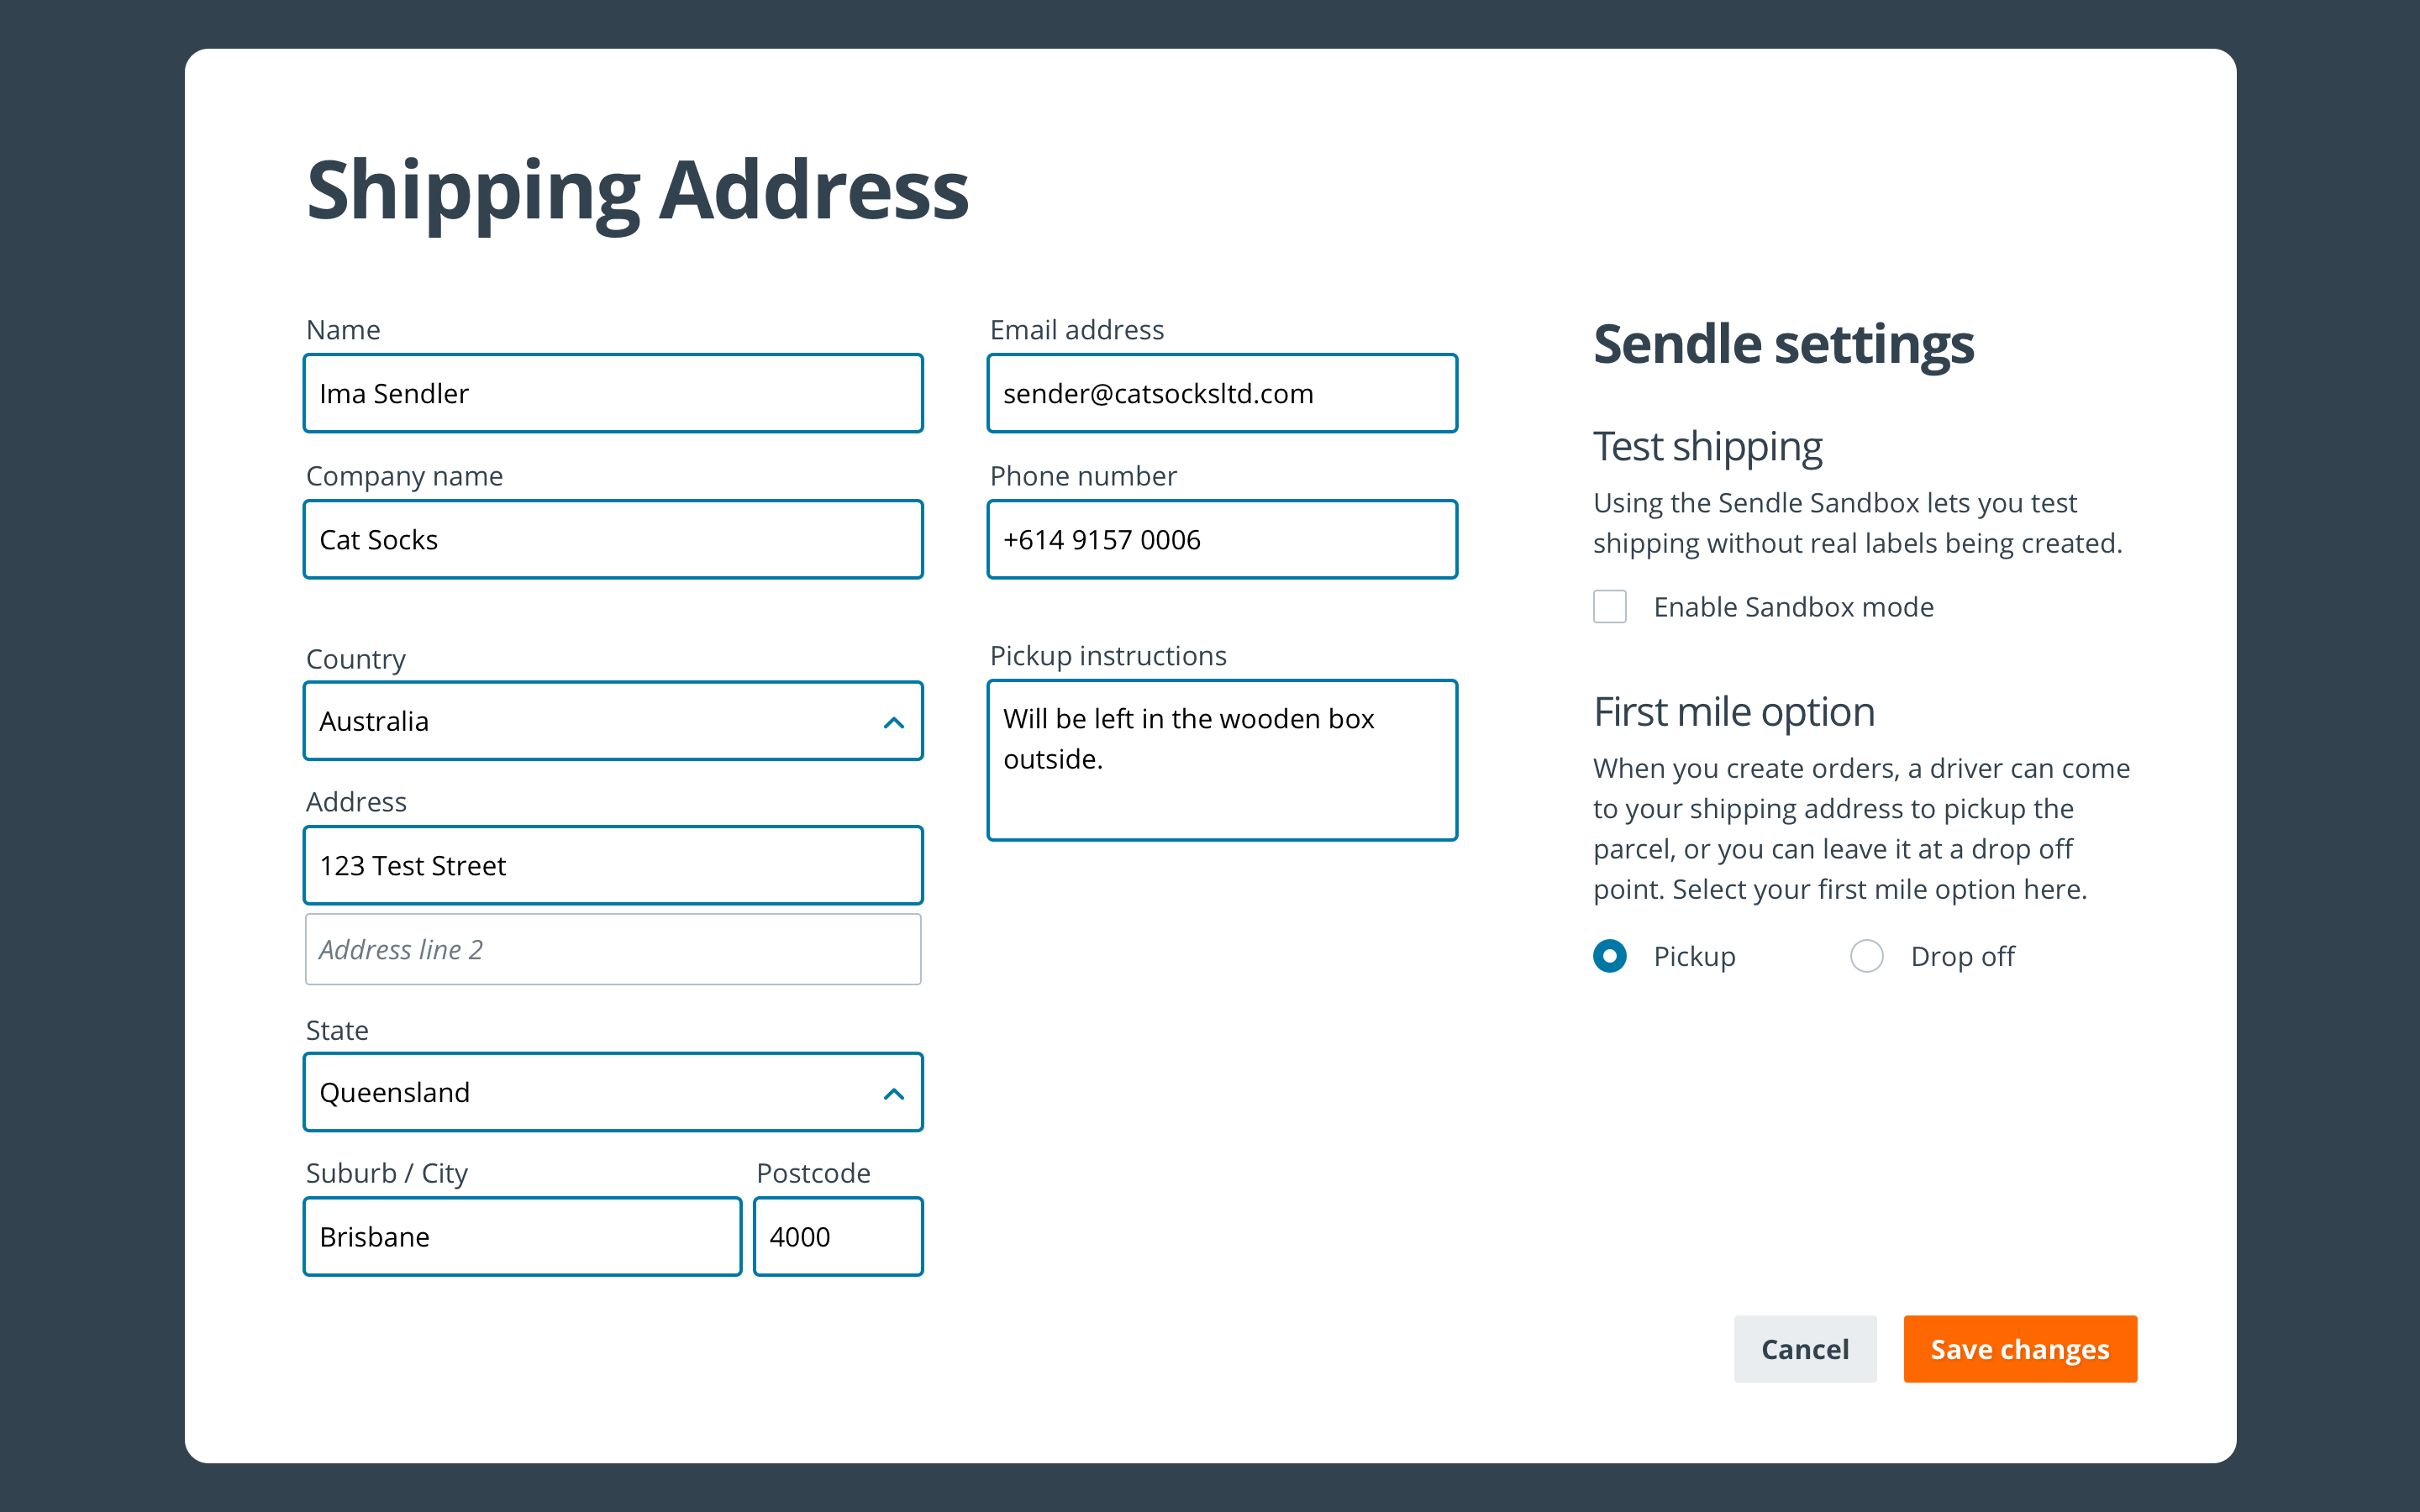
Before the checkout flow happens, the sender will need to specify their own address and pickup instructions.
In addition, they need to specify which first mile option to use – whether a driver will come and collect parcels or whether they will be left at one of our drop-off points. Your software could also present a way to use the Sendle Sandbox environment, for testing.

Sender Details page, showing the sender address, pickup instructions, and first mile option selector.
Checkout
Here is what the buyer sees during checkout. At this point, the store software knows how much the parcel weighs (based on what's being purchased) and the sender address (specified above).
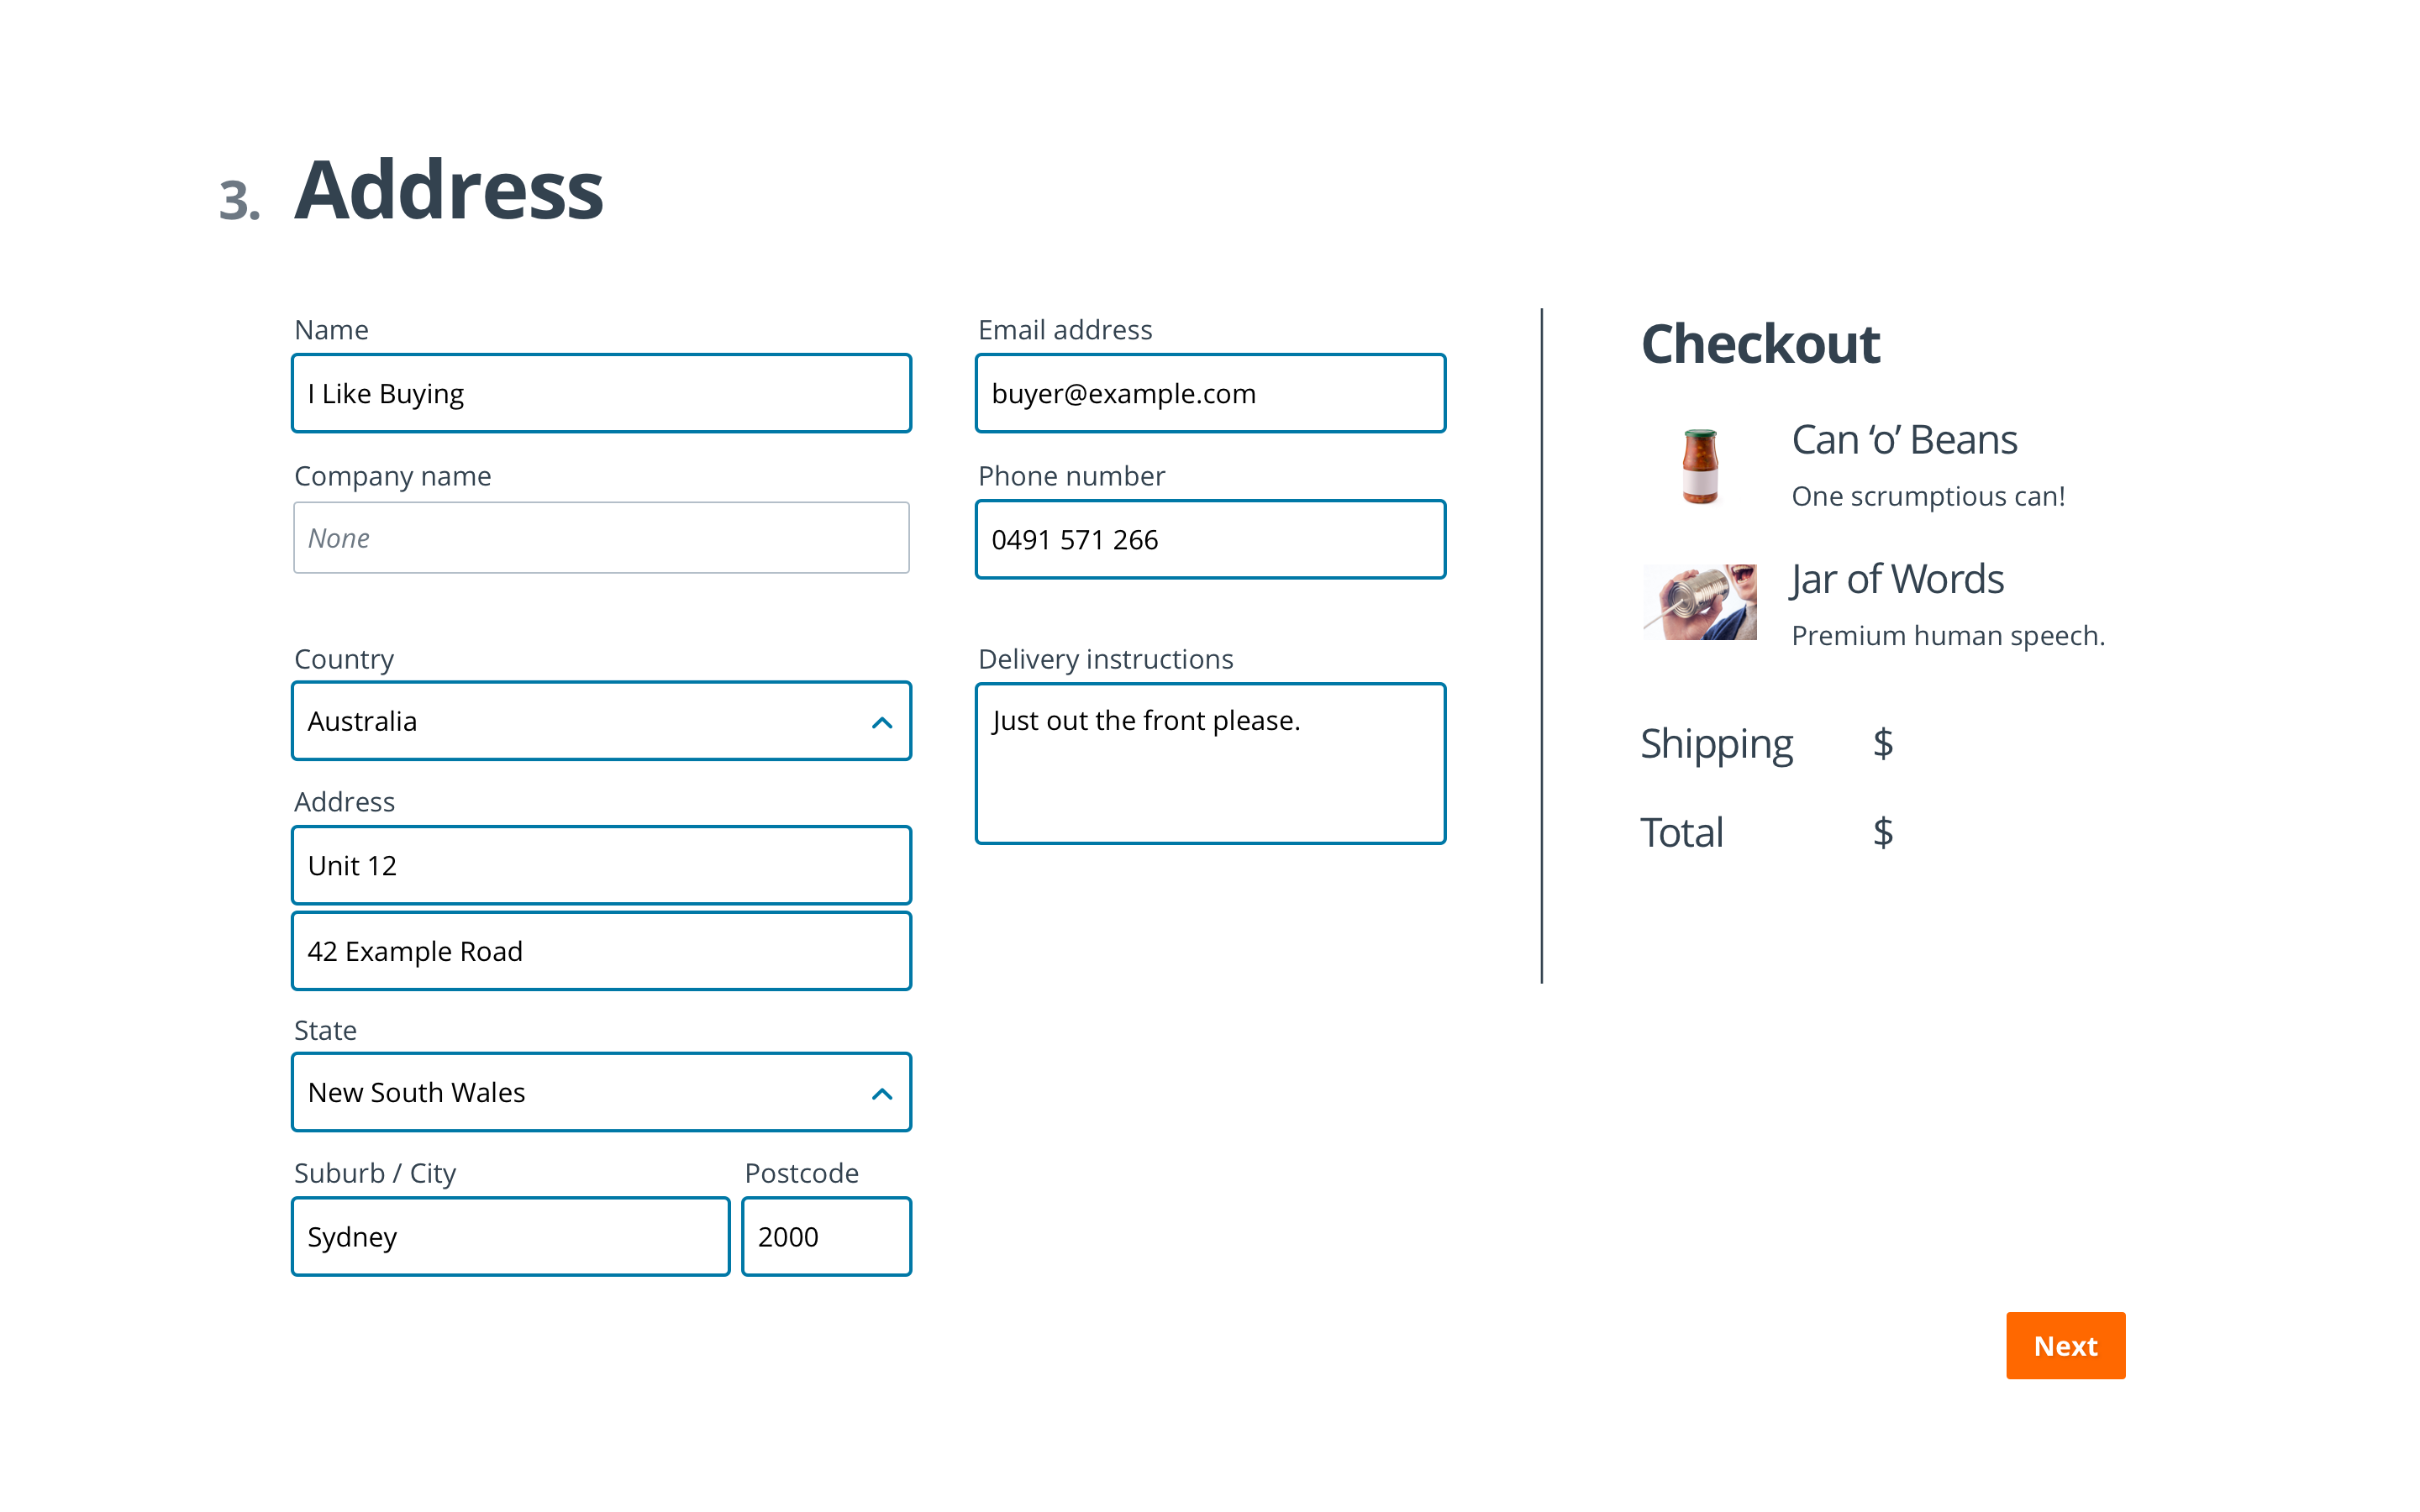
First, the buyer lists their own address and delivery instructions. These details allow quotes to be made from the sender's address to theirs:

Buyer Details page, showing the buyer's address and delivery instructions.
After the Next button is clicked, the system calls our Get Products endpoint with the parcel weight, sender address, and receiver (buyer) address. Upon receiving the response, the system filters out any quotes with a first mile option that's not supported (if the sender chose Pickup, then Drop Off quotes are ignored).
In addition to letting the buyer select a shipping service, this step also ensures Sendle can fulfil the selected route.
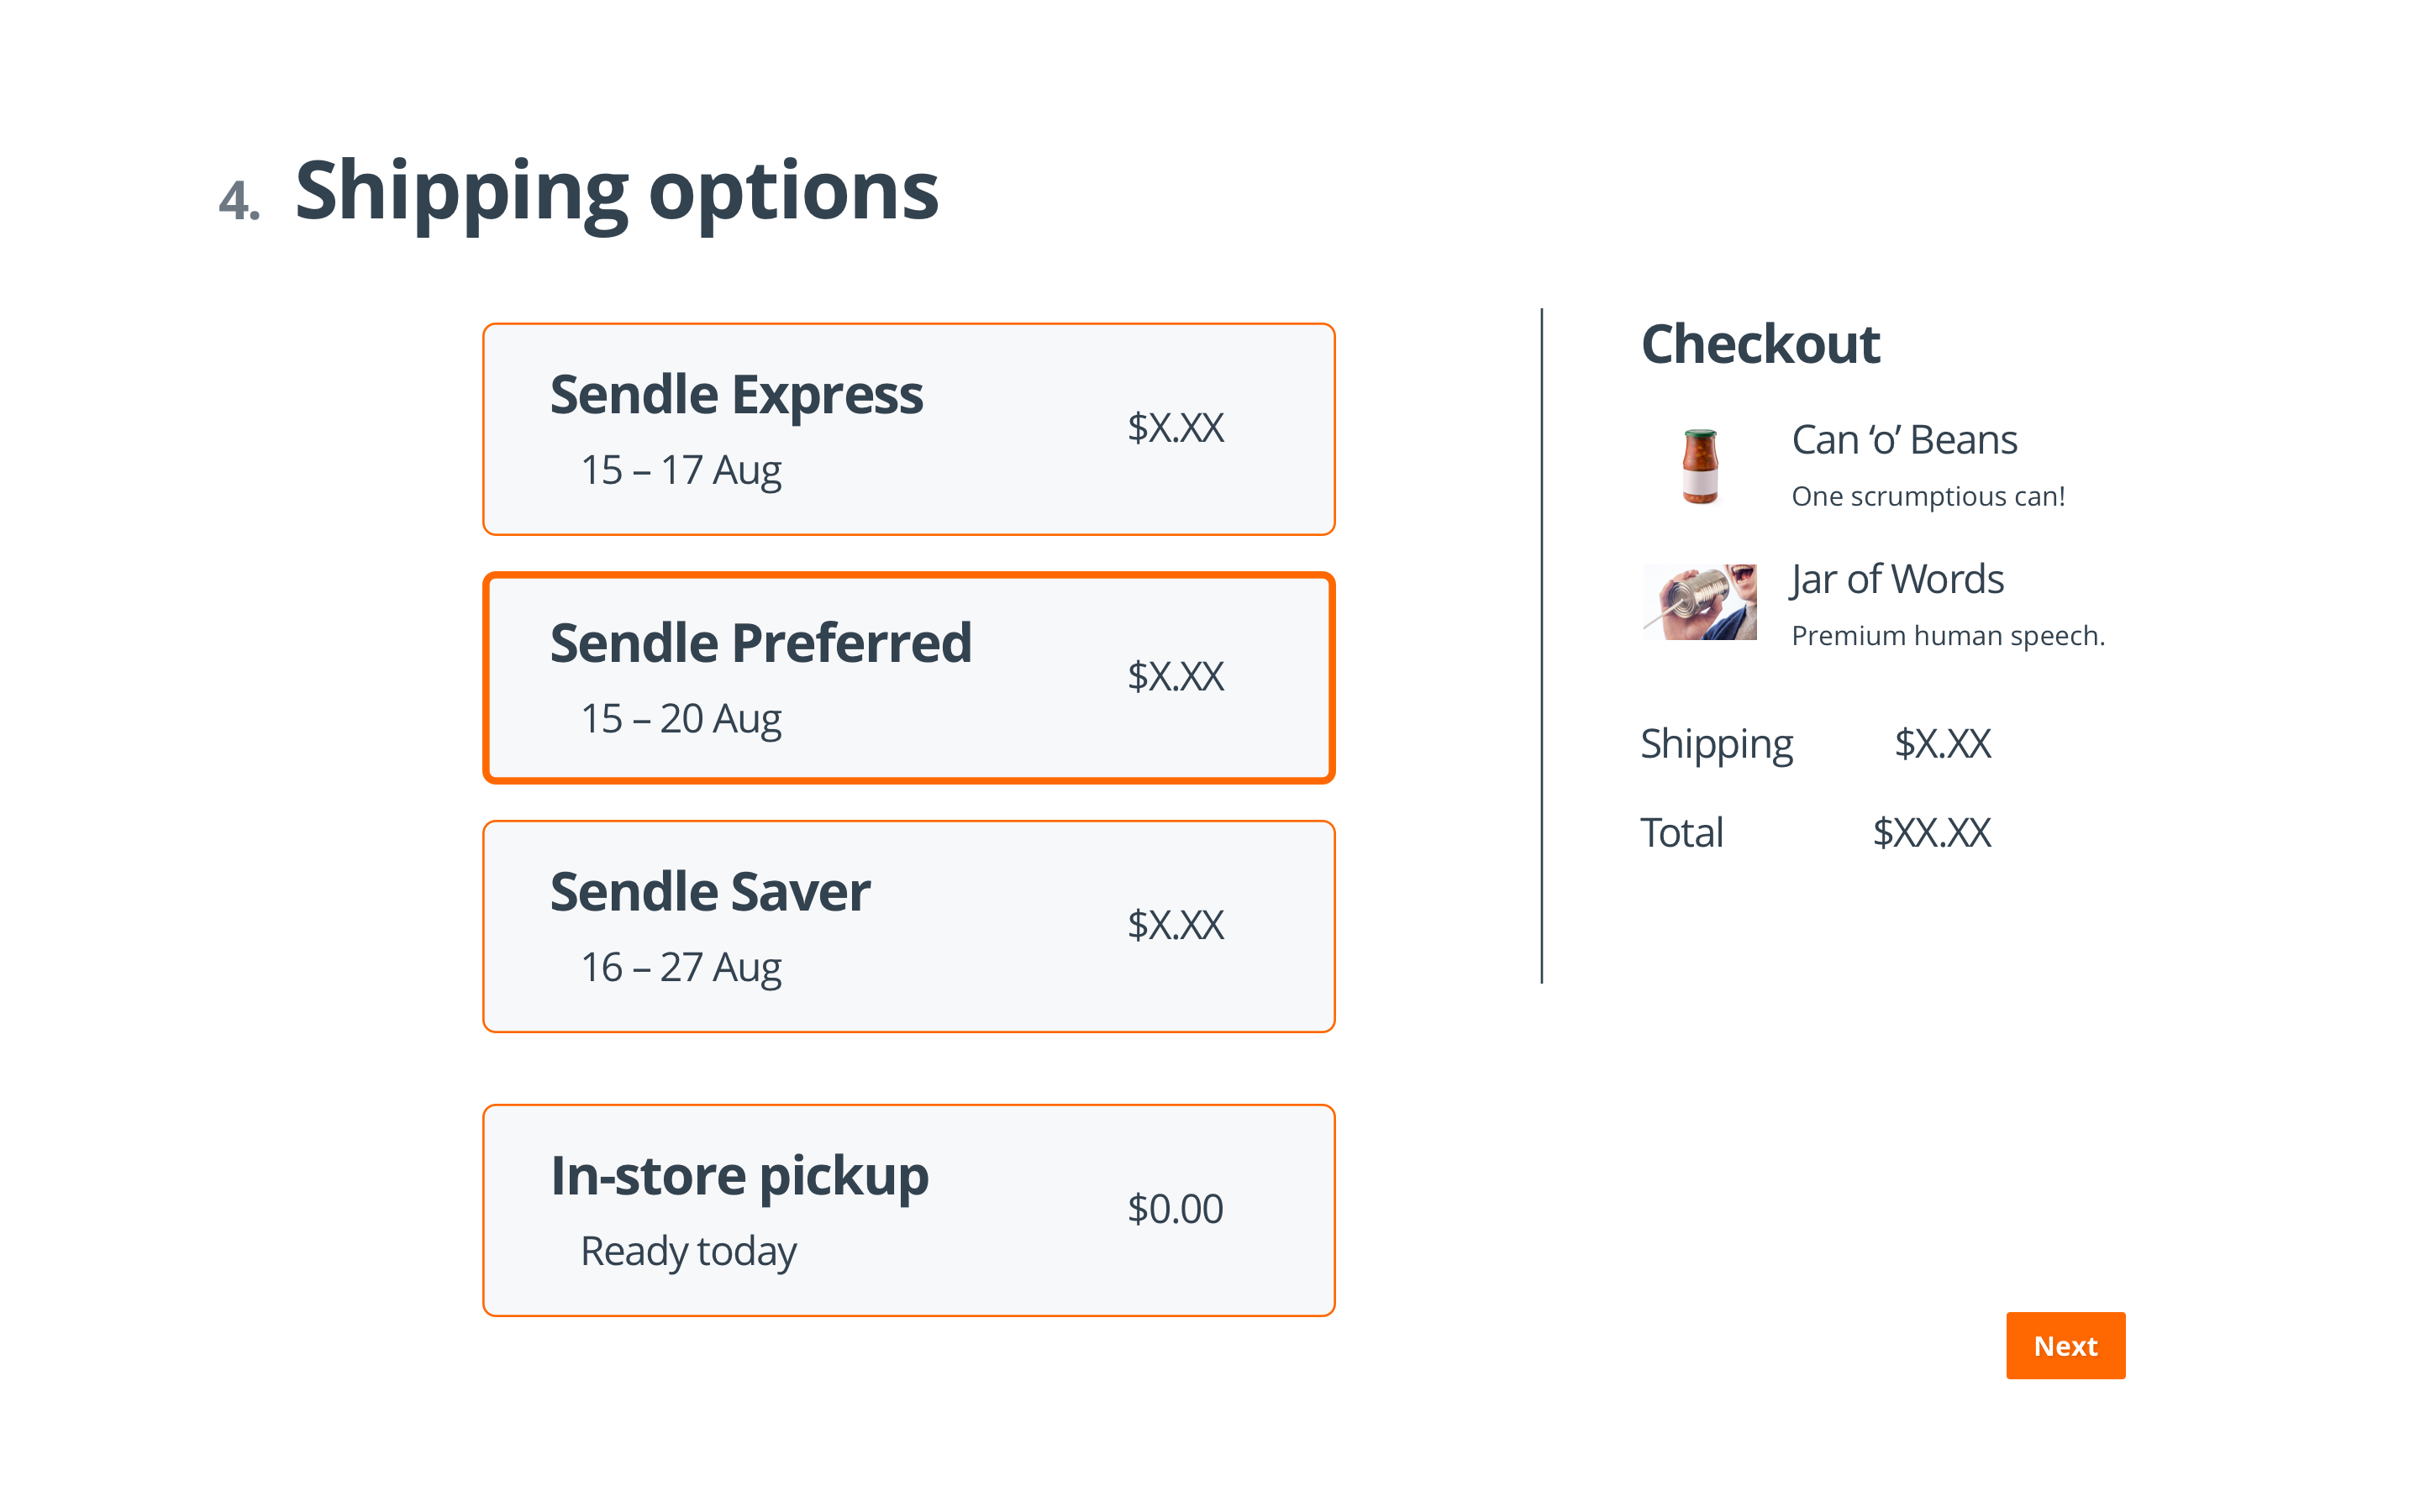
Now, the quotes are presented to the buyer. Each quote has its own ETA, description, and price:

Shipping page, showing each available shipping product, ETAs, prices.
Once the buyer selects a shipping product, they are directed to pay for their order plus the shipping quote.
Creating the shipment
Our Create Order endpoint gets called, with the selected product code, to create the shipment. Some store software does this automatically after the buyer submits the order, some does it based on rules, and some software waits for the shipper to explicitly do this step themselves. No matter how your system submits an order, there are two steps to be done after this: printing the label, and showing the tracking page.
Showing labels
The store software goes through the Getting Printable Labels process to retrieve the label file link and present the PDF to the sender. That page describes two possible options, downloading the PDF in software or presenting the download link directly to the sender's browser.
Whichever option is chosen, showing the sender both the cropped and A4/Letter label options makes sure they can print however is most convenient to them.
Showing tracking
The store software then gives the sender some way to view tracking information for the order, once it has been created with Sendle. This can be done by assembling a public tracking page link, or a authorised tracking page link for resellers. Additionally, our system provides tracking information with the Track a Parcel endpoint, which can be read by the store software for presentation in dashboards and other pages.
Updated 7 months ago
